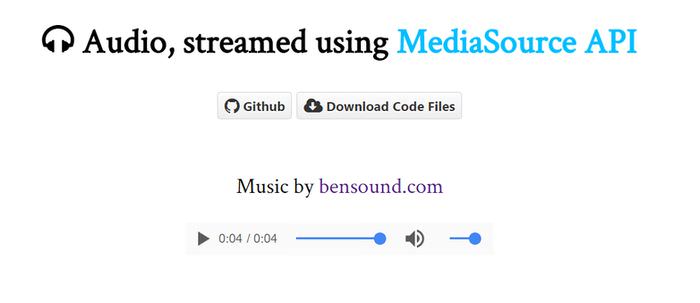
With the MediaSource API, you can generate and configure media streams right in the browser. It allows you to perform a variety of operations on media data held by media-related HTML tags such as <audio> or <video>. For instance, you can mix different streams, create overlapping media, lazy load media, and edit media metrics such as change the volume or the frequency.
In this post, we’ll specifically see how to stream an audio sample (a truncated MP3 file) with the MediaSource API right in the browser in order to pre-show music to your audience. We will cover how to detect support for the API, how to connect the HTML media element to the API, how to fetch the media via Ajax, and finally how to stream it.
How to Display Timed Transcript Alongside Played Audio
Audio transcript is the text version of speech, helpful in providing useful materials like recorded lectures, seminars, etc.... Read more
If you want to see in advance what we are up to, have a look at the source code on Github, or check out the demo page.


Step 1 – Create the HTML
To create the HTML, add an <audio> tag with a controls attribute to your page. For backward compatibility, also add a default error message for users whose browsers don’t support the feature. We will use JavaScript to turn on/off this message.
<audio controls>
Your browser doesn't support HTML audio element.
</audio>
Step 2 – Detect browser support
In JavaScript, create a try…catch block that will throw an error if the MediaSource API is not supported by the user’s browser, or, with other words if MediaSource (the key) does not exist in the window object.
try {
  if (!'MediaSource' in window)
    throw new ReferenceError('There is no MediaSource property
          in window object.')
  } catch (e) {
    console.log(e);
}
Step 3 – Detect MIME support
After the support check, also check for the support of the MIME type. If the MIME type of the media you want to stream is not supported by the browser, alert the user and throw an error.
var mime = 'audio/mpeg';
if (!MediaSource.isTypeSupported(mime)) {
  alert('Can not play the media. Media of MIME type ' +
        mime + ' is not supported.');
  throw ('Media of type ' + mime +
        ' is not supported.');
}
Note that the code snippet above needs to be placed inside the try block, before the catch block (for reference, follow the line numbering or check out the final JS file on Github).
Step 4 – Link the <audio> tag to the MediaSource API
Create a new MediaSource object, and assign it as the source of the <audio> tag by using the URL.createObjectURL() method.
var audio = document.querySelector('audio'),
mediaSource = new MediaSource();
audio.src = URL.createObjectURL(mediaSource);
Step 5 – Add a SourceBuffer object to MediaSource
When a HTML media element accesses a media source and is ready to create SourceBuffer objects, the MediaSource API fires a sourceopen event .
The SourceBuffer object holds a chunk of media that is eventually decoded, processed and played. A single MediaSource object can have multiple SourceBuffer objects.
Inside the event handler of the sourceopen event, add a SourceBuffer object to MediaSource with the addSourceBuffer() method.
mediaSource.addEventListener('sourceopen', function() {
  var sourceBuffer = this.addSourceBuffer(mime);
});
Step 6 – Fetch the media
Now that you have a SourceBuffer object, it’s time to fetch the MP3 file. In our example, we’ll do so by using an AJAX request.
Use arraybuffer as responseType, which denotes binary data. When the response is successfully fetched, append it to SourceBuffer with the appendBuffer() method.
mediaSource.addEventListener('sourceopen', function() {
  var sourceBuffer = this.addSourceBuffer(mime);
  var xhr = new XMLHttpRequest;
  xhr.open('GET', 'sample.mp3');
  xhr.responseType = 'arraybuffer';
  xhr.onload = function() {
      try {
          switch (this.status) {
              case 200:
                sourceBuffer.appendBuffer(this.response);
                break;
              case 404:
                throw 'File Not Found';
              default:
                throw 'Failed to fetch the file';
         }
      } catch (e) {
        console.error(e);
      }
    };
    xhr.send();
});
Step 7 – Indicate the end of the stream
When the API has finished appending the data to SourceBuffer an event called updatend is fired. Inside an event handler, call the endOfStream() method of MediaSource to indicate that the stream has ended.
mediaSource.addEventListener('sourceopen', function() {
  var sourceBuffer = this.addSourceBuffer(mime);
  var xhr = new XMLHttpRequest;
  xhr.open('GET', 'sample.mp3');
  xhr.responseType = 'arraybuffer';
  xhr.onload = function() {
    try {
      switch (this.status) {
        case 200:
            sourceBuffer.appendBuffer(this.response);
            sourceBuffer.addEventListener('updateend', function (_){
                mediaSource.endOfStream();
            });
            break;
        case 404:
            throw 'File Not Found';
        default:
            throw 'Failed to fetch the file';
      }
    } catch (e) {
      console.error(e);
    }
  };
  xhr.send();
});
Step 8 – Truncate the media file
The SourceBuffer object has two properties called appendWindowStart and appendWindowEnd representing the start and end time of the media data you want to filter. The highlighted code below filters the first four seconds of the MP3.
mediaSource.addEventListener('sourceopen', function() {
  var sourceBuffer = this.addSourceBuffer(mime);
  sourceBuffer.appendWindowEnd = 4.0;
  ...
});
Demo
And that’s all, our audio sample is streamed right from the web page. For the source code, have a look at our Github repo and for the final result, check out the demo page.
Browser support
As of writing this post, the MediaSource API is officially supported in all major browsers. But the testing shows that the implementation is buggy in Firefox, and Webkit browsers still have troubles with the appendWindowStart property.
As the MediaSource API is still in its experimental stage, access to higher editing functions may be limited but the basic streaming feature is something you can make use of right away.
The post How to Stream Truncated Audio Using MediaSource API appeared first on Hongkiat.
Posted by: https://anaheimsigns.com
No comments:
Post a Comment